Web Design Notes:
Do you see how the photos are arranged here? They are staggered to create rythym and balance. You could have all the pictures on one side, that would be OK too. Just make sure you plan the look of your page.
Titles are in bold to draw attention to them.
Lists are "bulleted" to make them easier to read.
Consider designing an interesting animated gif for your web page!
Troubleshoot your page. Do all the links work? Do the graphics show up as they are supposed to? Sometimes, pages look different in different browsers, different computers, or different screens.
You may set up your page and find it looks OK, only to see that things don't line up the way you want when you view it on a wide monitor.
Keep your page up to date. Don't let "link rot" set in!
Add key words and a page description. This "meta information" allows your site to be found by others.

 Banjo
straps can be expensive, and often there are not a lot of styles to choose
from. If you want something distinctive, you may end up having to pay
a fair bit to get something custom made. However, most music stores carry
dozens of guitar straps in a variety of styles and colors.For
just a few dollars, you can make your own cradle to which you can then
attach any standard guitar strap that you like.
Banjo
straps can be expensive, and often there are not a lot of styles to choose
from. If you want something distinctive, you may end up having to pay
a fair bit to get something custom made. However, most music stores carry
dozens of guitar straps in a variety of styles and colors.For
just a few dollars, you can make your own cradle to which you can then
attach any standard guitar strap that you like.
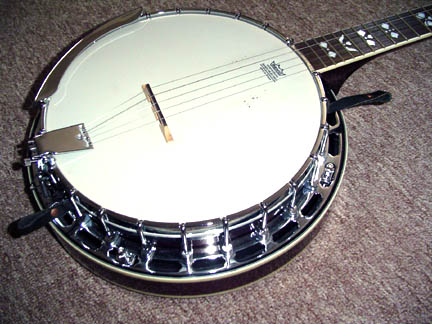
Don't use a strap that places the weight of the banjo onto specific points on the instrument body or neck. I like to use the common approach of "cradling" the body of the banjo so that it is gently but firmly held in place.
Following these simple "how to" instructions, you will be able to create something that is strong, durable,and will very likely last the life of your instrument! This is the system I use and it has served me well for years. You only need a few simple tools and inexpensive materials.
Materials:
-
Copper rivets: A small package costs a couple of dollars in a hardware store.
-
A strip of leather - about 2 feet long. I recommend using an old solid leather belt. If you don't have one, stop by your local thrift store and pick one up for next to nothing.
 Tools:
-
Utility knife
-
A metal straight edge: a carpenter's square is ideal, but any straight metal edge will do.
-
Hammer
-
Drill (If you don't have one, you can use an awl, or anything that will help you to puncture a hole through the leather belt
Step
One:
Create a strip of leather about 2 1/2 feet long (80 cm) and 3/4 of an
inch (1.5 cm) wide.
The width will vary depending upon your instrument. It has to fit around
the body of your banjo.
Using the metal straight edge and the utility knife, cleanly cut the strip
from the belt
 Step
Two:
Step
Two:
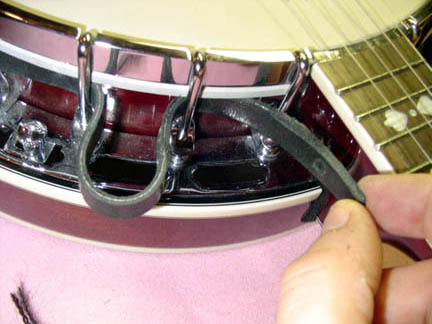
Thread the leather strip between the the J-hooks and the outer edge of
your instrument.
Start at the underside of the neck (we will call this the 3 o'clock position)
and continue on until just before the tail piece (9 o'clock position.)
Step
3:
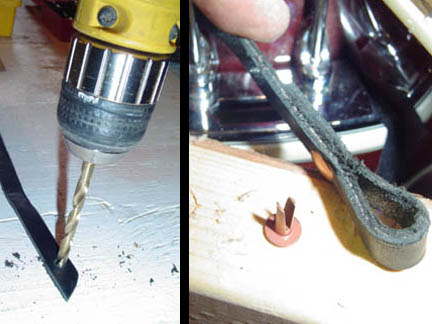
Take one end of the strap and make a loop. Drill or punch a hole through
the strap and fasten the loop with a copper rivet. Simply push the rivet
through the holes and hammer it flat.
(You could also use a lace or some such thing to close the loop, but I
prefer a strong rivet)
 Step
4:
Step
4:
Do the same thing at the other end, but first trip off any excess leather
so that your strap ends at the 9:00 and 3:00 position on your instrument.
You should now have a "cradle": a strap the runs under the J-hooks
and against the body of the instrument, with riveted loops at either end.
Step
5:
Now it is simply a matter of attaching a standard guitar strap in any
fashion that is appropriate.
I used metal clips that I recycled from a keychain, but you could use
laces, clips, or any other technique that serves the purpose.